In this article, we will explore how to interface an SSD1306 OLED display with the Raspberry Pi Pico using MicroPython. We’ll cover an overview of the SSD1306 display, understand the basics of I2C communication, list the components required, go through the wiring setup, and provide detailed code explanations for displaying dynamic text on the screen.
To complete this project, you’ll need the following components:
- Raspberry Pi Pico
- SSD1306 OLED Display (I2C version)
- Jumper Wires
What is the SSD1306 OLED Display?

The SSD1306 is a popular monochrome OLED display driver that controls small OLED screens commonly used in electronics projects. These displays are typically available in resolutions like 128×64 or 128×32 pixels. With high contrast, low power consumption, and clear visuals, the SSD1306 OLED is ideal for projects requiring compact displays. The module communicates with microcontrollers via I2C or SPI protocols; in this project, we’ll use I2C, which is simpler and only requires two data lines.
Understanding I2C Communication
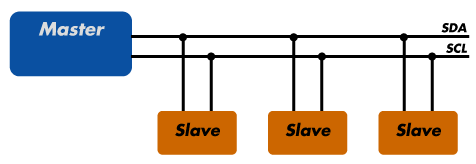
The Inter-Integrated Circuit (I2C) protocol is a common communication method for short-range data exchange between integrated circuits. I2C allows communication over just two pins: SDA (Serial Data) and SCL (Serial Clock). In our case, the Raspberry Pi Pico will act as the master, and the OLED display will act as the slave. Data is transmitted over these lines in synchronized clock pulses, making it ideal for low-bandwidth communication with peripheral devices like OLED screens, sensors, and more.
Components Needed
Wiring the SSD1306 OLED to the Raspberry Pi Pico
The I2C OLED display typically has four pins: VCC, GND, SCL, and SDA. Here’s how to connect it to the Raspberry Pi Pico:
| OLED Pin | Pico Pin |
|---|---|
| VCC | 3.3V |
| GND | GND |
| SCL | GP5 |
| SDA | GP4 |
MicroPython Code to Display Dynamic Text on the SSD1306
Now that the wiring is complete, let’s move to the coding part. We’ll write code to display dynamic messages on the OLED display, which will change every second.
Step 1: Setting Up the SSD1306 Library
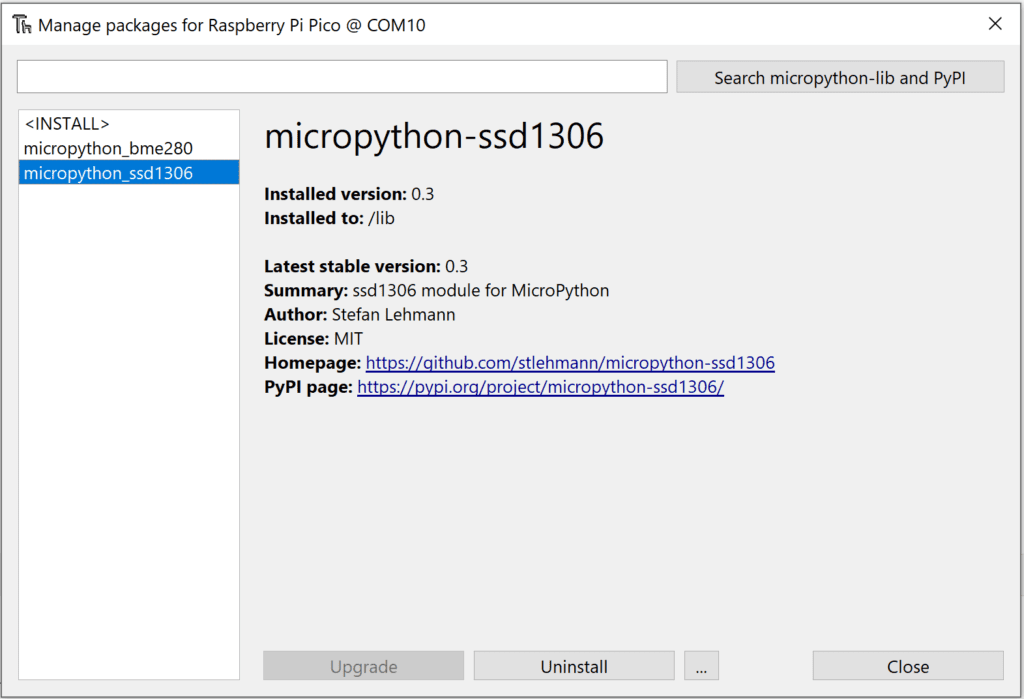
Before we start coding, make sure you have the ssd1306.py library. This library provides functions to control the OLED display using MicroPython. You can download the ssd1306.py file from the official MicroPython GitHub repository. Once downloaded, upload it to your Raspberry Pi Pico via your MicroPython IDE, like Thonny.
Step 2: Writing the Code
The following code initializes the OLED display and continuously updates it with different messages in a loop.
from machine import Pin, I2C
import ssd1306
import time

# Initialize I2C (using GP4 for SDA and GP5 for SCL)
i2c = I2C(0, scl=Pin(5), sda=Pin(4), freq=400000)

# Create the OLED display object
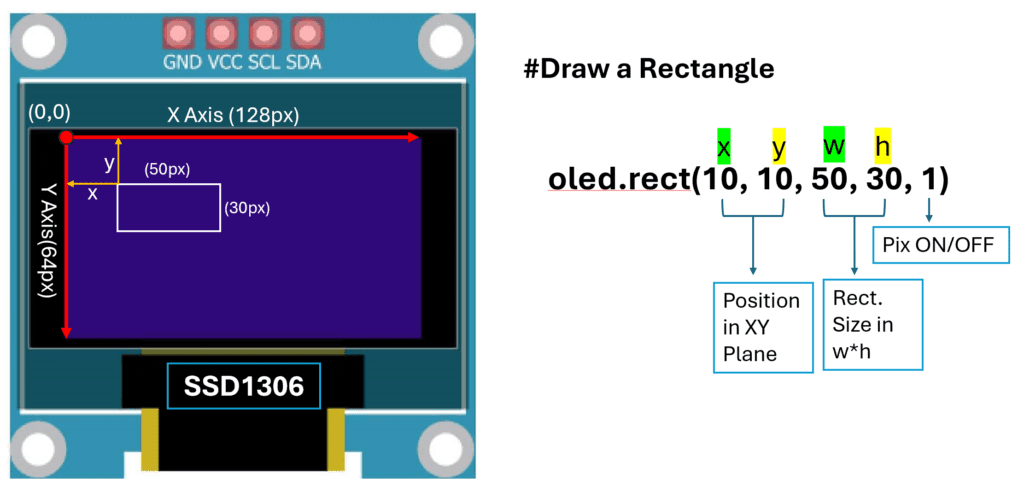
oled_width = 128
oled_height = 64
oled = ssd1306.SSD1306_I2C(oled_width, oled_height, i2c)

# Clear the display at the start
oled.fill(0)
oled.show()

# Texts to display
texts = ["Hello, World!", "Mutex Firmware", "Raspberry Pi Pico", "MicroPython Rocks!"]
index = 0

while True:
    # Clear the display
    oled.fill(0)

    # Display the current text
    oled.text(texts[index], 0, 0)
    oled.show()

    # Move to the next text
    index += 1
    if index >= len(texts):
        index = 0  # Reset to the first text after the last one

    # Wait for 1 second before updating the text
    time.sleep(1)
Code Explanation
- I2C Initialization: The code initializes the I2C communication on the Pico, using GPIO 5 for SCL and GPIO 4 for SDA. The
freqparameter sets the communication speed to 400kHz. - OLED Object Creation: The
SSD1306_I2Cclass from thessd1306library creates an object for controlling the display. The screen width and height are specified as 128 and 64 pixels, respectively. - Clear the Display: The
oled.fill(0)command clears the display by filling it with black, andoled.show()updates the display with these changes. - Dynamic Text Array: The list
textsholds a set of strings that will be displayed one after the other. You can modify these texts as needed for your application. - Infinite Loop: The
while Trueloop continually updates the display:- Clears the display.
- Sets the current text from
textsat the top left corner. - Advances to the next text in the list by incrementing
index. If the end of the list is reached, it resetsindexto 0. - Adds a 1-second delay between each update using
time.sleep(1)to make the text readable.
SSD1306 Display Explanation
Running the Code
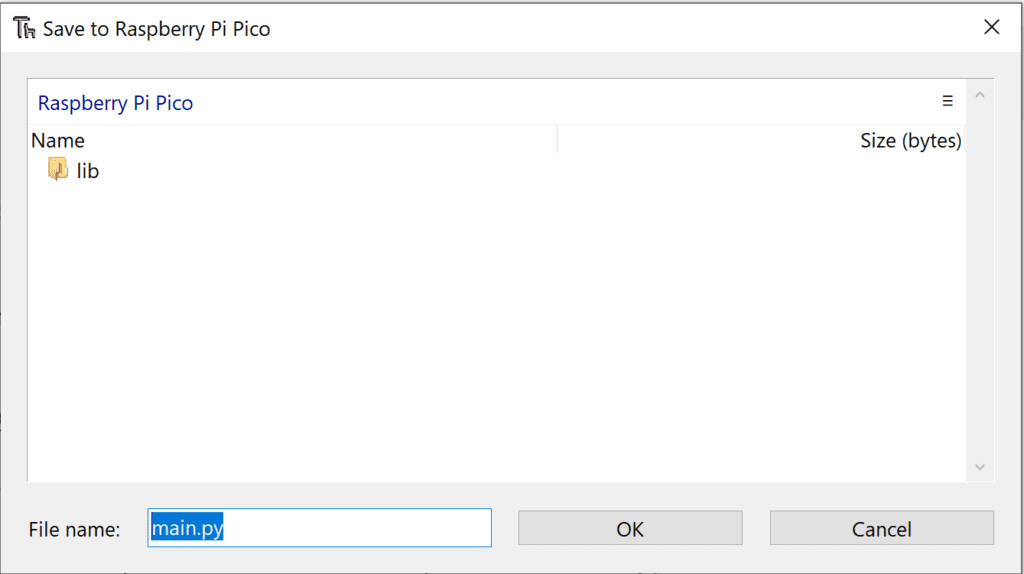
- Save this code to your Raspberry Pi Pico as
main.py. - When you power on the Pico, the OLED display will cycle through the different texts every second.


Conclusion
Using MicroPython, we can easily interface the SSD1306 OLED display with the Raspberry Pi Pico and display dynamic messages. This project provides a foundational example for implementing more complex displays and animations, and can be adapted for various applications, such as showing sensor data, time, or even simple graphics. By understanding I2C communication and the SSD1306 display, you’ll be well-equipped to create engaging visual output for your future projects.
Feel free to modify the displayed text or add more complex visuals to make it fit your needs. Enjoy building!

